Showing posts with label Research and Development. Show all posts

Thursday, February 11, 2010

Tuesday, February 9, 2010

Saturday, February 6, 2010

Critique 1(FYP2): Learn/Study. #2

I just downloaded a book about Action Script 3.0.


These are the topics that I plan to study. I will highlight the topic that I have read.

Part I Getting Started 1
Chapter 1
ActionScript Overview
The Flash Platform
Procedural Versus Object-Oriented Programming
The Document Class
Legacy Code Compatibility

Chapter 2
Core Language Fundamentals
Miscellaneous Basics
Variables and Data Types
Conditionals
Loops
Arrays
Functions
Custom Objects
this
Absolute versus Relative Addresses

Chapter 3
Properties, Methods, and Events
Inherited Attributes
Properties
Events
Methods
Event Propagation
Frame and Timer Events
Removing Event Listeners

Chapter 4
The Display List
The Sum of Its Parts
Adding and Removing Children
Managing Object Names, Positions, and Data Types
Changing the Display List Hierarchy
A Dynamic Navigation Bar

OOP
Classes
Inheritance
Composition
Encapsulation
Polymorphism
Navigation Bar Revisited

Part IV Sound and Video 219
Chapter 11
Sound
ActionScript Sound Architecture
Internal and External Sounds
Playing, Stopping, and Pausing Sounds
Buffering Streaming Sounds
Changing Sound Volume and Pan
Reading ID3 Metadata from MP3 Sounds
Visualizing Sound Data
Working with Microphone Sound
Waveform Visualization

Chapter 12
Video
Encoding
Components
Full-screen Video
Captions
Coding Your Own Video Playback

Chapter 13
Loading Assets
Loading Sound and Video
Loading Text
Loading Display Objects
Communicating Across ActionScript Virtual Machines
Taking a Brief Look at Security

Go go go!!!

Saturday, January 23, 2010

Critique 1(FYP2): Weeeeeee!! #1


R&D for Emosive.

Hello new semester! We love you.

Monday, December 7, 2009

Critique: 3 Organization & Management(Software R&D) #5

I did an experiment on how to connect CCV(multitouch tracker) to Max/MSP. This experiment is done without any tutorials, simply because I can't find any. So, the development is very slow. So far I could connect the CCV to Max/Msp. Changing the sound pitch according to X and Y axis in CCV. I'll post a video when my MT mini is available.


Very interesting. I might end up doing a multi-touch music instrument or a very huge version of Jazzmutant Lemur for my FYP.

A bit too late to change idea isn't it?

Anyway, if I am able to connect CCV to MAX/Msp, I probably can connect it to MAX/Jitter, a video programming language in MAX. Therefore, I am able to control video with with CCV through MAX/Msp/Jitter instead of Flash. MAX has faster processing power compared to Flash.

But I am still comfortable with Flash AS3.

Saturday, December 5, 2009

Critique: 3 Organization & Management(Technical R&D) #3

On last Tuesday, Mr. Kok Yoong invited a guest lecturer, Mr Cheong from Engineering Faculty. He gave an interesting speech about Multi-touch Technology. He is a cool lecturer I must say. Very passionate, I feel like I'm attending some kind of Multi-Level Marketing talk.

Ok back to work.

According to Mr. Cheong, the theory to create the multi-touch is already there on the internet. but still, the actual hands on is not as easy as it looks in the theory.

Since the hardware technical for my installation is the hardest part to do. I decided to start the research and experiment as soon as possible.

I decided to start with converting a normal Webcam into infrared Camera.

"v) Infrared Camera
Infrared camera will be use in this installation. It will only detect infrared light(in this case blob from the surface). I have to modified the camera in order to make the camera detect only the infrared light and ignore the rest." - From my previous research/post.

Here is my Xbox Live Webcam that I'm going to sacrifice. :(


I follow this site to make the conversion. Credit goes to whoever they are. The site shows step by step on how to convert Xbox Live Webcam into infrared camera.

I am going to show some of the picture I took during the conversion process.

1. First, I took off the focusing ring because that’s what is keeping the front face of the camera from coming off other than the clips.


2. Open the case apart with screwdrivers


3. Unscrew everything that can be unscrewed. I lost one of the screw during this process. Too bad. :(


4. Base on my readings, some of the camera have and infrared-block filter. For this camera, it has infrared-block filter installed on top of the sensor. I had to remove it.


5. I replaced the infrared-block filter with two pieces of negative films.


6. Snap everything together and test.

Testing with infrared led. Pressure Map screen(on the left) shows that the camera detected the IR light from Astro remote control.


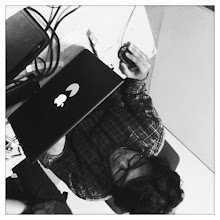
Now to check whether the camera detects other than infrared light. I pointed the webcam to my Macbook screen. Pressure Mapping screen(on the left) shows the webcam is no longer detecting the visual from the screen. Wohooo!


Succeed

Critique: 3 Organization & Management(Technical R&D) #2

Guess what did I bring back to my hometown.

not clothes

but

this.

Tool box, Power Supply and Multimeter

Last minute-work! Yay!

I am thinking of doing some experiment on how to hot wire a PC power supply, so I can switch it on without going through a motherboard.

I'm planning to use this PC power supply to light up infrared lights and some ventilation fans for the installation(so my slave inside the box wont die because of the heat. yekekekekeaahh!!)

Guess what?

I forgot to bring back power wire for the PC power supply.

Great.

I hate last-minute work.


This is a video tutorial on how to hotwire a power supply.


p/s: I shall update about this experiment for the next critique.

Sunday, November 22, 2009

Critique: 2 Research and Analysis(Design Approach) #5

The design approach that i wanted to do is analogue design. This will consist of hand drawing, hand writing and scribble. I choose this concept to show that technology does not only consist of digital design. Technology can be analogue and also mechanical.

Precedence studies on design approach.


Image via here.


Image via here.


I'm thinking of doing the box design something like this. It is a steampunk concept, it looks like mechanical computer so it suits with the whole analogue concept. I'm still not sure about this though. Just a thought.


Reference
http://en.wikipedia.org/wiki/Analog_computer
http://en.wikipedia.org/wiki/Mechanical_computer
http://en.wikipedia.org/wiki/Steampunk

Critique: 2 Research and Analysis(Technical) #4

This post will cover the software that will be use in this project.

vii) Blob tracker software.
Community Core Vision (CCV) formerly know as tBeta Programming Language: C++
Status: active
Source code: not yet
License: MPL or MIT (not defined)
Page: http://tbeta.nuigroup.com/
Description: Community Core Vision, CCV for short, is a open source/cross-platform solution for computer vision and multi-touch sensing. It takes an video input stream and outputs tracking data (e.g. coordinates and blob size) and touch events (e.g. finger down, moved and released) that are used in building multi-touch applications. CCV can interface with various web cameras and video devices as well as connect to various TUIO/OSC enabled applications and supports many multi-touch lighting techniques including: FTIR, DI, DSI, and LLP with expansion planned for the future (custom modules/filters).


I will be using CCV to track the blob and send to programming language(In this case Flash AS3)

viii) Flash AS3
I will be using Flash AS3 to receive the blob data from CCV and turn it into event in Flash. I will make further research on Video Interaction in Flash AS3.


Reference
http://tbeta.nuigroup.com/
http://wiki.nuigroup.com/Applications_and_libraries#Framework_or_Library_name

Critique: 2 Research and Analysis(Technical) #3

v) Infrared Camera
Infrared camera will be use in this installation. It will only detect infrared light(in this case blob from the surface). I have to modified the camera in order to make the camera detect only the infrared light and ignore the rest. There are few method to modified the camera.

Some camera has infrared-block filter. I need to remove the filter first. Once the camera is modified to being able to see normal light as well as IR-light, I need to apply
an IR-pass filter. This IR-pass filter, lets all the IR through, but blocks out most of the visible light.

There are different materials that can use for this purpose:
- IR-pass filter

Image via here.

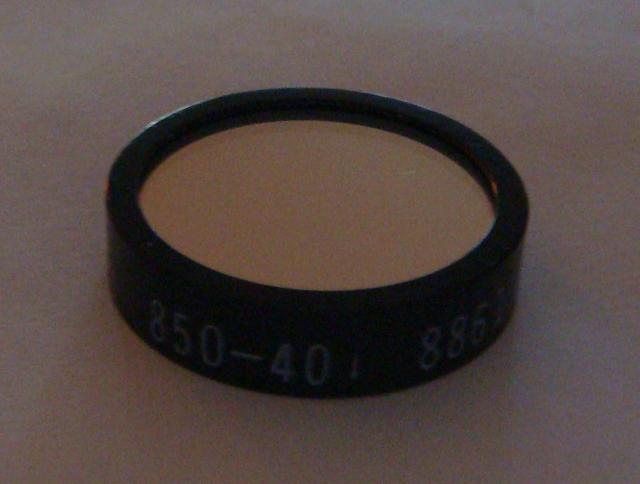
An IR-pass filter is a special filter that only passes through IR on a certain frequency (760 nm to for example 1000 nm). So it basically blocks out all other light, that’s not within that region, that would be most of the visible light.

- IR-band pass filter

Image via here.

The IR-band pass filter only passes through IR on a specific frequency.
For example: 880 (nm). So if I use 880 (nm) IR-LEDs and I use an IR-band pass filter of 880 (nm) as well, I will get the best optical performance, because all the light is blocked out, except for the specific IR from the LEDs.

- Black photo negatives


Image via here.

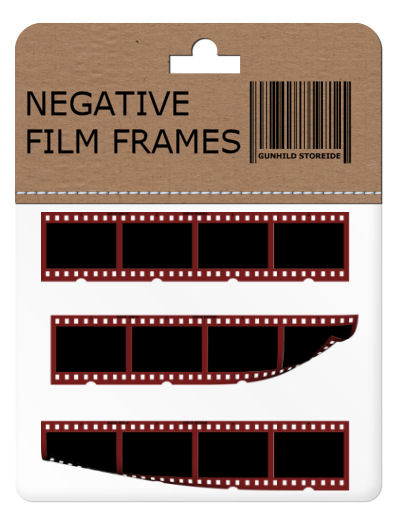
Another option is to use negative film. Just use several layers of entirely black photo negatives on the lens.

Conclusion
I probably going to use negative film as IR filter because of a low budget scenario and usability. I serious need a sponsorship.

vi) Infrared light.
Infrared is a portion of the light spectrum that lies just beyond what
can be seen by the human eye. It is a range of wavelengths longer than visible light, but shorter than microwaves. In this project infrared light will be use to detect finger touch on the surface.


Image via here. IR LED kit.


Reference.
http://nuigroup.com/forums/viewthread/3117/
http://nuigroup.com/forums/viewthread/4459/
http://wiki.nuigroup.com/How_to_Modify_Cam

Critique: 2 Research and Analysis(Technical) #2

ii) Surface Materials
Surface Material that can be use as surface is Tempered Glass or Acrylic Glass. If I use Acrylic Glass, I need a thick enough(more than 6mm) surface so it does not flex when pressed (to avoid short-term hotspots becoming blobs).

Acrylic glass. Image via here.

I will be using Acrylic Glass for my project because of its durability and also availability.

iii) Surface Diffuser and Projection Surface.
I also need some kind of surface for projection and diffusion. People have used vellum, tracing paper, fabric interfacing, and even cheap plastic tablecloths or shower curtains on top of the surface, in addition to frosted glass or acrylic. Before purchasing a frosted material and/or diffuser I have to test the surface’s suitability both as a projection surface and as an IR diffuser.

I have not decide what kind of projection surface to use yet because it's involve some experiment. I probably will use tracing paper simply because it's cheap.

iv) Projector
The use of a projector is one of the methods used to display visual feed-
back on the table. Any video projection device (LCDs, OLEDs, etc.)
should work but projectors tend to be the most versatile and popular
in terms of image size.

One thing to consider with projects is brightness. It’s measured in ANSI lumens.
The higher the number the brighter the projector and the brighter the setting can
be. In a home theater setting you alway want a brighter screen but in a table setup it differs.

One of the biggest limiting points of a projector is the throw distance. This is the
distance that is needed between the lens of the projector and the screen to get the
right image size. For example in order to have a screen size of 34in, then you may
need to have a distance of 2 feet between you projector and the screen. Check to
see if your projection image can be adjusted to fit the size of the screen you are
using.

Since my installation going to be around 36inches height, I need to use Short-Throw Projector to get a bigger image. This is the website to calculate projector dimension.


A short-throw projector. BenQ MP515ST Projector. Price around RM2000. I need a sponsorship! Image via here. View the specification here.

Reference
http://www.acrylic-in-china.com/images/cast-acrylic-sheet-007.jpg
http://www.digitalprojectorshop.com/images/MP515%20ST.jpg
http://nuigroup.com/forums/viewthread/7139/
http://nuigroup.com/forums/viewthread/1119/

Critique: 2 Research and Analysis(Technical) #1

I will devide my research into three parts.
1) Technical - Hardware/Software.
2) Design Approach.
3) Proposal Content.

I will start with Technical first. Basically this will cover all the Hardware and Software that are required in order to create this installation.

Since I'm doing DIY Multi-touch Technology, there are few things I need to do research on.
Main hardware:
i) The surface method.
ii) Surface materials
iii) Surface diffuser
iv) Projector
v) Infrared camera
vi) Infrared light.

Software:
vii) Blob tracker.
viii) Flash AS3

i) Surface Method.
There are 3 types of infrared surface technique in Multi-touch:

Frustrated Total Internal Reflection(FTIR)


Total Internal Reflection describes a condition present in certain materials when light enters one material from another material with a higher refractive index, at an angle of incidence greater than a specific angle (Gettys, Keller and Skove 1989, p.799)

This is the method of flooding the inside of a piece of acrylic with infrared light by trapping the light rays within the acrylic using the principle of Total Internal Reflection. When the user comes into contact with the surface, the light rays are said to be frustrated, since they can now pass through into the contact material (usually skin), and the reflection is no longer total at that point.

Diffused Illumination (DI)


Diffused Illumination (DI) comes in two main forms. Front Diffused Illumination and Rear Diffused Illumination. Both techniques use the same basic principles.

Infrared light is shined at the screen from below the touch surface. A diffuser is placed on top or on bottom of the touch surface. When an object touches the surface it reflects more light than the diffuser or objects in the background; the extra light is sensed by a camera. Depending on the diffuser, this method can also detect hover and objects placed on the surface.

Laser Light Plane Illumination (LLP)


Infrared light from a laser(s) is shined just above the surface. The laser plane of light is about 1mm thick and is positioned right above the surface, when the finger just touches it, it will hit the tip of the finger which will register as a IR blob.
Conclusion
After consideration I choose Diffuse Illumination as a Infrared Surface. These are the reasons:
- No need for a compliant surface, just an diffuser/projection on top/bottom
- Can use any transparent material like glass (not just acrylic)
- No LED frame required
- No soldering (I can buy the IR- Illuminators ready to go)
- Can track objects, fingers, fiducials, hovering.
- I'm using enclose box
- Easier to setup


However there are few cons:
- Difficult to get even illumination
- Blobs have lower contrast (harder
to pick up by software)
- Greater chance of ‘false blobs’

Reference
http://nuigroup.com/forums/viewthread/1982/
http://wiki.nuigroup.com/Laser_Light_Plane_Illumination_%28LLP%29
http://wiki.nuigroup.com/Diffused_Illumination
http://wiki.nuigroup.com/FTIR